RESEARCH
Evaluation: Researching different types of each Material for this project helped me compare prices and quality and gave me more options to chose from to make sure my choice of materials were well thought through and I was buying with good value.
paper


Cost:
Plain Paper (500 sheets):
$5.60 (1.12c per page)
Grid paper (50 sheets): $1.97 (3.94c per sheet)
Selection: Plain white recyclable copy paper
Justification: Having plain paper with no lines or grids on it makes it better to draw or sketch on as the other lines don't get in the way of your sketch. The plain paper is also recyclable which helps the environment and makes sure the paper isn't going to waste.
Pencils


Cost:
HB (3 pack): $3.20 ($1.06 per pencil)
2B (2 pack): $1.88 ($0.94 per pencil)
Selection: Officeworks graphite HB pencils
Justification: HB is the best lead grade for sketching as it is not too dark and not too light and is the perfect thickness for sketching different floorplans.

pens

Cost:
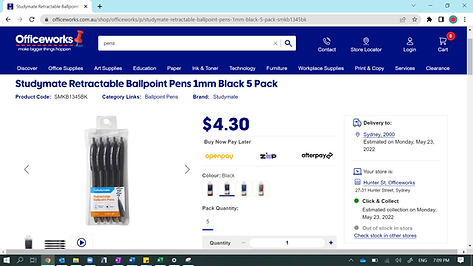
Black Pens (5 pens): $4.30 ($0.86 per pen)
Blue Pens ( 4 pack): $10.50 ($2.625 per pen)
4 color pens (4 pack): $12.98 ($3.245 per pen)
Selection: Officeworks 4 color pen
Justification: 4 colors on a pen makes it more useful because it is like 4 pens in one and you can color code your work using just the one pen. It was really good for labelling the sketches as I used different colors for different titles, I used black for room names and blue for the annotations.

notebook


Cost:
A4 Spiral Notebook: $1.24
A5 Spiral Notebook: $4.19
Selection: Officeworks A5 Notebook
Justification: A5 was the best size for writing to-do lists and organizing my time as I used one page per day and the page size is perfect to list the daily tasks. The A5 page also fits perfectly when I slip it into my computer case beside my computer.
eraser

Cost:
Officeworks Eraser: $0.38
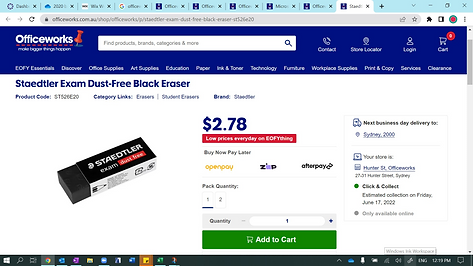
Dust-free black eraser: $2.78
Selection: Dust-free black eraser
Justification: The dust-free eraser is perfect for sketching as it is much less mess and it was very noticeable that the standard eraser smudged my sketches when I used it while the dust-free didn't smudge the pencil at all as it rubbed it out.
ruler

Cost:
Flexible Ruler: $2.59
Plastic Ruler: $0.49
Selection: Flexible ruler
Justification: The flexible ruler is easy to carry in my bag and less likely to snap as it is made out of bendy material. Also the texture feels good to use and grips onto the paper as you use it.

triangle set


Cost:
Oxford 9 piece Maths set: $7.26
Keji Plastic 8 piece Maths set: $1.73
Selection: Oxford 9 piece Maths set
Justification: The oxford Maths set comes in a tin case which means I can keep it in my bag and the pieces can keep together. This set is also better quality than the other option and has one extra piece.
computer


Cost:
Lenovo ThinkPad: $1434
Lenovo IdeaPad: $1097
Selection: Lenovo ThinkPad
Justification: This computer is a really good size and has a smooth and finished modern feel about it. It offers a wide variety of features suited to this Assessment such as ARCHICAD 23 and a range of Microsoft and Adobe apps.
mouse


Cost:
Wired mouse: $7
Microsoft Modern Bluetooth mouse: $43
Microsoft Bluetooth Mouse: $24
Selection: Microsoft modern Bluetooth mouse
Justification: ArchiCAD is so much easier to use with a computer mouse. A mouse is particularly useful when zooming in and out. Without a mouse, it is awkward to zoom in and out whereas with one, it only takes one finger to zoom. This particular modern mouse is flatter than most which I find is more relaxed and easier to use and being wireless, it is a lot more efficient as the dongle is always plugged into my computer.

earphones


Cost:
Woolworths Sonic B Wireless Earphones: $40
Apple AirPods (wireless): $174
Apple EarPods (with headphone cord): $29
Selection: Woolworths Sonic B Wireless Earphones
Justification: These are the earphones I chose because I like wireless earphones the best as they are easier to use without cords to keep out of the way. This particular pair of Bluetooth earphones are the best option as they are not too expensive and are a good price for the budget.

PRESENTATION MEDIA:
Evaluation: Researching different softwares that I could use for Presentation media gave me a wider outlook as it laid out all of my options of different technology softwares to use throughout my project and helped me to try using different programs that I haven't used before such as the adobe apps. These presentation media apps are great for this project and have helped a lot for presenting, displaying and working on my portfolio.
Microsoft word


Cost:


Description:
Microsoft word is the most commonly used word processor software. It is used to create professional quality documents, letters, reports and resumes and allows you to edit or modify new and existing documents.
Use/Evaluation:
I used word documents in this task for the checkpoint submissions. I copied all my work from OneNote onto Word to submit via canvas. This made it efficient and easy to submit my work. For some of the documents, particularly those with pictures inserted into it, I would then convert to an Adobe Acrobat PDF so the pictures and words stay in the same place and don’t move around so easily.
Microsoft OneNote


Cost:

Description:
OneNote is a digital note-taking app that provides a single place for keeping all of your notes, research, plans, and information. This software serves as a digital notebook that never runs out of paper.
Use/Evaluation:
I used OneNote during his task for my work in progress. This way my teacher could see my progress as I work and give me feedback. It also meant that I could organize all of my portfolio in one spot with a page per section, making it easier to work and more manageable. The OneNote app doesn’t need internet connection to work, meaning I could work on bus trips where there wasn’t internet.
Microsoft excel


Cost:


Description:
Excel is a Microsoft software that consists of spreadsheets to organize numbers and data with formulas and functions.
Use/Evaluation:
I used excel to create my time plan and finance plan. It was the best software to do this on as it offers all the functions needed to create these tables and keeps it even and neat.
Power Point


Cost:
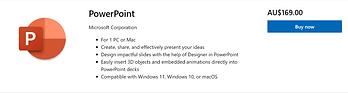

Description:
PowerPoint is Microsoft's presentation software that enables users to create engaging presentations that consist of individual pages, or slides, which may contain text, graphics, sound, movies, hyperlinks, and other objects. PowerPoint enables users to add animation and effects to slideshow elements.
Use/Evaluation:
I used Power Point for the screen recording function. This allowed me to screen record my computer while using ARCHICAD and other softwares to then put into my walk-through video at the end of my assessment.
OneDrive

Cost:


Description:
OneDrive is the Microsoft cloud service that connects you to all your files. It lets you store and protect your files, share them with others, and get to them from anywhere on all your devices.
Use/Evaluation:
OneDrive was very helpful for this task as we had access to shared folders made by Mr Brigham that were full of useful resources such as past HSC Band 6 Portfolios and research documents including the AS1100.301 Architecture Standards document which you have to pay for otherwise.
Microsoft Outlook


Cost:


Description:
Microsoft Outlook is the preferred email client used to send and receive emails by accessing Microsoft Exchange Server email. Outlook also provides access contact, email calendar and task management features.
Use/Evaluation:
Outlook was very useful during this task as it was a way I could reach out to my teachers and peers for questions when I wasn’t at school or on zoom. It was also an easy way to send things to myself from an open computer, such as screenshots of YouTube tutorials for the resources section of the portfolio.

Cost:

Description:
Wix is a free, user-friendly, website building platform. Our intuitive technology and powerful built-in features give our users the freedom to design professional websites with ease that look amazing on any device.
Use/Evaluation:
I used Wix to create my portfolio as a website. I decided to display my portfolio as a website rather than a word doc or pdf because there is a lot more options of different functions and the software is more suited to the task as you can add different pages and sections and insert photos and videos onto the pages with ease.
Adobe acrobat


Cost:
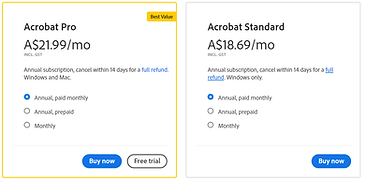
Description:
Adobe Acrobat is a family of application software that allows the viewing, printing and management of portable document files (PDF).
Use/Evaluation:
For each of the checkpoint submissions, I copied my work across from OneNote into a document to submit. I am much more comfortable with creating documents in MS Word but Adobe Acrobat is much better to submit to canvas, especially when there are pictures inserted into the document. It keeps everything in place and stops it from changing the layout, text, and picture location of the page. Even though I didn't create any documents in Adobe Acrobat, I converted some of my Word documents to this PDF software for submission.
Adobe PHOTOSHOP


Cost:


Description:
Photoshop is an image creation, graphic design and photo editing software developed by Adobe. The software provides many image editing features for pixel-based images, raster graphics and vector graphics.
Use/Evaluation:
I haven't used photoshop in this portfolio as it is a bit confusing and I don’t really have the time at the moment to figure it out but I am planning to use it for creating posters and advertisements for my ski lodge.
Adobe Illustrator


Cost:

Description:
Adobe Illustrator is the industry standard design app that lets you capture your creative vision with shapes, colour, effects, and typography. Work across desktop and mobile devices and quickly create beautiful designs that can go anywhere—print, web and apps, video and animations, and more.
Use/Evaluation:
I haven't used Illustrator as it is a bit confusing and I don't need it yet but It is an option for creating extra posters and advertisements for my ski lodge.
Adobe Premiere pro


Cost:

Description:
Premiere Pro is used for editing videos, commercials and other film, television, and online video.
Use/Evaluation:
I found this program when I got Adobe Creative cloud installed onto my computer for Photoshop so I haven't used this program before. When editing videos, I have always just used simpler softwares. It will take a bit of time to get to know how all of the adobe apps work as I have never used them before.
Video Editor


Cost: FREE
Description:
The Video Editor App is used for fast and simple single-clip editing. It has a set of video creation and editing tools, allowing you to include music, text, motion, and 3D effects. It's a successor to Movie Maker, with a focus on easy-to-use creative tools that help you tell your story.
Use/Evaluation:
This is the software that I used for editing my screen recordings and creating the clips for the graphics processes section as it is very simple and easy to use for editing single clips.
RoomStyler


Cost:

Description:
RoomStyler is a simple to use floor planner and designing tool suitable for non-professionals. The platform enables users to instantly create 2D and 3D designs for their dream home at a button's click. Users can easily design a 2D floor plan with the help of thousands of built-in templates and then decorate these designs by choosing the ones that suit them the best from a list of available furniture options from well-known brands.
Use/Evaluation:
I used RoomStyler to design the interiors of some of the rooms of my ski lodge to show what the interiors look like.


Cost:

Description:
Canva is an Australian graphic design platform, used to create social media graphics, presentations, posters, documents and other visual content. The app includes templates for users to use.
Use/Evaluation:
I thought about using Canva for designing graphic designs such as logos and posters as It is very useful and easy as it has templates to use.
TRAINING IN THE USE OF TECHNOLOGY/RESOURCES:
Evaluation: These resources have helped me in the use of using and understanding new technologies as I am not very skilled in that area and I am using technologies that I have never used before and need some guidance and assistance in how to use them. Video tutorials have been very helpful as I can go over them and watch them in my own time and can watch them as many times as I need to understand something.
Breakout Rooms

Description:
Almost every lesson, our class was put in breakout rooms. One for Architecture, one for product and one for questions.
Use/Evaluation:
Breakout rooms allowed us Architecture Students to help each other out with creating our projects in ARCHICAD. Collectively, our skills were greater than any of us individually.
YouTube ARCHICAD Tutorials (on modelling the terrain)
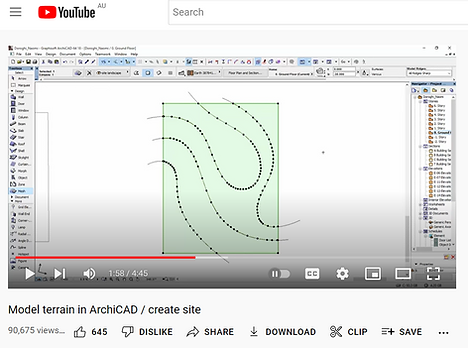

Description:
I found a YouTube tutorial to help me understand how to model the terrain on ARCHICAD.
Use/Evaluation:
This helped me get an idea of how to create my mountain mesh. The video offered some tips and tricks to make it easier. An example of this is instead of clicking each spline tool, dropping down the design settings outlining the polygon with magic wand, you simply have to select the mesh function, hold the space bar down and click on each contour line.
Zoom Recordings


Description:
There was a lesson where Mr Brigham came into our zoom and we all asked him questions about the task, mostly about how to create different plans in ARCHICAD. This lesson was recorded and we then had access to watch the video.
Use/Evaluation:
I had the video bookmarked on Google Chrome so I could easily access it at any time. The video was very helpful as I could always go back to it and watch it as much as I needed to. Any questions I had with creating the plans, I would go back to the video and it would answer most of my questions.
OneDrive ARCHICAD tutorials folder

Description:
Mr Brigham gave us access to Shared OneDrive folders with ARCHICAD tutorials.
Use/Evaluation:
This meant that anything we were having trouble with on ARCHICAD, we could ask Mr Brigham to upload a tutorial on it. We could go back to these tutorials and watch them whenever we needed.
OneDrive Shared Folder with previous students HSC work


Description:
Mr Brigham gave us access to Shared OneDrive folders of past Band 6 HSC work.
Use/Evaluation:
These files were very useful as they gave us an example of what is expected of us. They show things like the extent of research needed to get good marks and how other students have set out their portfolios.
Teacher Feedback

Use/Evaluation:
The checkpoints meant that I could see how I went for each section and if I was on the right track then I could apply the teacher feedback to make my end result better.
Description:
Submitting checkpoints along the way made sure we got our work assessed and were given feedback from our teacher.
AS1100 Standards:
Evaluation: Researching the AS1100 Standards for Australia helped me to understand the importance of presenting plans and drawings in the right was and gave me a better understanding of the ways drawings are meant to be presented and the symbols and abbreviations used. This was especially useful when creating the plans as the Drawing Standards document for Architecture outlines how these plans should be presented and what information to include.
AS1100 is the drawing standard that is used within Australia for both mechanical and architectural designs. These drawing standards, if followed by all companies, make for a clear understanding across all drawings produced, nation wide. Detail drawing contains the key aspects needed to create a clear design or drawing. This includes regulations around things that are shown and the information given in a detailed drawing such as dimensioning, scale, angles of projection, textures, treatments and a tile block containing the drawing title, drawing number, drafters, name of organization, date, scale, sheet size, etc.
The Drawing Standards also includes set symbols for different aspects of a drawing. The following are some examples of typical architecture symbols.

As1100.301:
AS1100 Standards is broken up into sections. The section that refers to Architectural Drawing is Part 301. This part of the Australian Standards is to provide builders, architects, drafting officers and others in the building industry with everything needed for the Architecture side of drawing, including symbols, abbreviations, layouts of drawing sheets, different types of house plans and what they include, representation of materials- hatching and coloring, etc.
The following are copied from the AS1100.301 document and outline different aspects of the architectural standards for Australia including different symbols, representations of materials and abbreviations.


Dimensioning:

Architectural dimensioning has to be done a certain way to measure up to the AS1100 standards. Below is the dimensioning standards copied straight from the AS1100.301 document.
Title block:
The title block is a box that exists on all architecture plans. This title block contains information about the plan or drawing such as the drawing name, drawing number, job title, date, sheet size, scale etc. Below is an example of a title block from the AS1100.301 document showing the information a title block should have on it and how it should be displayed.

Plans:
The following images are from a past students HSC portfolio. This student has annotated the plans from the AS1100.301 document, showing all the aspects needed in each plan. These helped me a lot as they clearly set out everything I needed to include in my plans.


Different drawing types:
Evaluation: There are different types of drawings that are created to show different views of an object, including Orthographic projections and Isometric and Oblique views. Researching these different drawing types helped me to understand the structure there is to the drawings in the graphics industry and they also helped me to create my sketches in the development of concepts and ideas section.
Orthographic Projections are a way of showing a 3D object in a set of 2D drawings. They display the object viewed from each direction. How the views are laid out depends on whether they are drawn in third or first angle projection. You can tell which projection is being used by the symbol shown on the drawing. Third angle projection can be visualized as an unfolding box. The object is 'unfolded' to show the views from each side. The views always line up with each other with the front view in the center and the other views around it in their places, top view above, side views either side and bottom view below. First angle projection is like an upside down box, drawn with the front view in the middle, bottom view above, top view below and the side views swapped around.
orthographic projections...


examples of third angle orthographic projections from Yr 11 drawing activity...


An isometric view is a way of drawing a 3D object with a true perspective. In this type of drawing, 3 sides of the object are shown in equal proportions, typically the front, top and side view. In an Isometric view, the lines all go back at a 30 degree angle.
Isometric views...
examples of Isometric views from Yr 11 drawing activity...
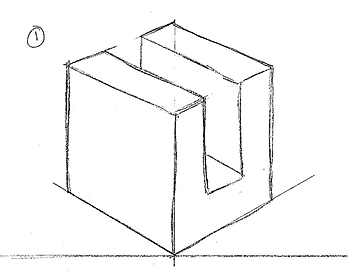

An Oblique view shows the full front view of an object with the top and side going back at a 45 degree angle and being either true to their measurements or half their measurements.
Oblique views...
examples of Oblique views from Yr 11 drawing activity...


One point perspective
One point perspective is a drawing method that shows how things appear to get smaller as they get further away, converging towards a single 'vanishing point' on the horizon line. It is a way of drawing objects upon a flat piece of paper so that they look three-dimensional and realistic.
example of one point perspective from Yr 11 drawing activity...

Two point perspective
Two-point perspective is a way of drawing with lines that all converge towards two vanishing points, which creates a more three-dimensional look.
example of one point perspective from Yr 11 drawing activity...

Location of my project:
My ski lodge is located on Mt Kosciuszko, NSW, Australia and is situated around the south west side of the mountain. This location is perfect for my ski lodge as it is a good distance away from other resorts such as Thredbo and Perisher and is a flat section of the mountain but with steep slopes right near it, perfect for the chair life and ski runs.


climate zone:
My project is located in the alpine region of nsw, therefore in climate zone 8.


wind region:
My project is located in wind region A, the largest region in Australia.

Development Application:
The New South Wales planning system enables and guides development to ensure we have housing, jobs and a healthy environment. Many forms of development require approval from your council, technically known as development consent. You apply for development consent by lodging a development application (DA).


This table shows us all of the plans that need to be submitted along with the Development Application for the new ski lodge.
Technology/cad softwares:
Evaluation: Researching different CAD softwares allowed me to discuss the pros and cons of each and compare the different softwares to decide which program to use to build my Ski lodge for the project.
Solid edge:


Cost:

Description:
Solid edge is a 3D CAD parametric feature and synchronous technology solid modelling software. It provides solid modelling, assembly modelling and 2D orthographic view functionality for mechanical designers. Solid edge is affordable and easy to use.
Use/Evaluation:
I did not use this program because it is mostly used for drawing products and 3D objects rather than architecture.
Key shot:


Cost:

Description:
KeyShot brings you real-time 3D rendering that displays results instantly and reduces the time to create realistic product visuals. KeyShot is trusted by brands around the world for its speed, ease of use, scientifically accurate materials, and advanced material editing capabilities.
Use/Evaluation:
I did not use KeyShot because it is not designed as the right program to use for architecture and doesn't offer the aspects that ArchiCAD does.
Sketch up:


Cost:

Description:
SketchUp is a 3D modelling computer program for a broad range of drawing and design applications including architectural, interior design, industrial and product design, landscape architecture, civil and mechanical engineering, theatre, film and video game development.
Use/Evaluation:
I did not use this program as it does not offer the same features as ArchiCAD does and is not as easy to work out.
Archicad:

Description:
ARCHICAD 23 is an architectural BIM CAD software. It is a complete design suite with 2D and 3D drafting, visualization and other building information modelling functions for architects, designers and planners.
Use/Evaluation:
This is the program I used to draw my house because it is designed for architecture and is perfect for what this task requires and offers all of the features needed. It is easy to navigate with tool bars along the left side, the top and easy access to all of the sections along the right.
Cost:


Cost:

Description:
Blender is a free and open-source 3D computer graphics software toolset used for creating animated films, visual effects, art, 3D-printed models, motion graphics, interactive 3D applications, virtual reality, and, formerly, video games.
Use/Evaluation:
I did not use blender for this project as the functions do not suit the tasks requirements
Software vs traditional methods
Evaluation: Researching the difference between how drawing in the graphics industry are done now compared to the traditional methods and how they used to be performed, allowed me to see the positives and negatives of both types and how each of them would affect the graphics industry. It also allowed me to learn some of the history of CAD softwares and develop a greater appreciation for them.
Software...
Computer Aided Design, also known as CAD, is the use of computers for design and technical documentation and has replaced manual drafting with an automated process. CAD programs can be 2D or 3D and are used by designers, drafters, architects, engineers and many other roles in the graphics industry. Different types of CAD software includes ARCHICAD, Solid Edge, Sketch Up, AutoCAD and KeyShot.
Most CAD softwares we use today have been around for over a decade and can be traced back to almost 50 years ago. The first CAD program was created in the 1950's, during WW2 by Patrick Hanratty, also known as the 'father of CAD'. Hanratty's dream was to develop a software that could turn 2D drawings into 3D, even though at the time it was declared impossible. Industrial analysts estimate that around 70% of CAD programs trace back to Patrick's original code.
Since it was created, CAD softwares have come a long way. Back then, they were very primitive in their capabilities and did not offer very many functions and are still constantly developing. Over time, CAD programs have added an increase to the functions available, productivity of designers and the quality of the work.
CAD Softwares impact workplaces in the graphics industry both positively and negatively.
Positive Impacts:
-
Saves time- Much less time consuming as it is the computer doing all of the work and most softwares have automated functions that save a lot of time, such as auto dimensioning, auto plans etc.
-
Increases productivity- The time saved by using CAD translated to an increase in productivity as more work can be completed in less time.
-
Easy to edit- Easier to make alterations on CAD softwares compared to hand drawings.
-
Improves accuracy- The accuracy of CAD drawings gives it a huge advantage over hand drawings as it is almost all automated and completely accurate.
-
Decreases errors- Computers and most CAD softwares are built to detect errors therefore making the work better quality.
-
Easy to share- Easy to save and send with ease.
Negative Impacts:
-
Work can be lost at the breakdown of technology- Technology is not 100% reliable and can breakdown sometimes so you need to make sure the drawings are backed up.
-
Need the skills- It takes certain skills to work CAD softwares that not everyone has.
-
Time and cost of training- A lot of time and cost goes into the training of workers to be able to know how to use CAD.
-
Higher cost- The CAD softwares themselves are a lot more expensive to use.
Traditional methods...
Before the launch of AutoCAD and other design software, engineering drawings were made on sheets of paper using drawing boards. Multiple pieces of equipment were required to complete a given drawing such as drawing boards, different grade pencils, erasers, T-squares, set squares etc.
Positive Impacts:
-
Doesn't cost as much to produce a drawing or plan
-
Can be worked on at anytime and doesn’t shut down or crash like software can
Negative Impacts:
-
Much more time consuming- takes a lot longer to produce a drawing compared to software
-
Uses more resources- such as paper, pencil and drawing equipment
-
Harder to make adjustments and corrections
-
Not as accurate as a computerized drawing
-
Can be easily ruined and doesn't have back up
-
Need the skills- only talented or trained people can draw plans by hand.